This chapter will provide a step-by-step guide on setting up a Salesforce org with Customer Relationship Management (CRM) analytics integrating it with Tableau, and highlighting the key features and configuration options for enabling CRM analytics. Next, we are going to cover the steps for setting up Tableau Desktop and Tableau Online, including installing the software and creating an account.
This chapter covers the following topics:
- Setting up a Salesforce org with CRM Analytics
- Setting up Tableau Desktop
- Getting started with Tableau Public
By the end of this chapter, learners will have gained a comprehensive understanding of how to set up a Salesforce organization, including its primary features and configuration options tailored for CRM analytics. Additionally, they will become familiar with the procedures to establish Tableau Desktop and Tableau Online, encompassing both the software installation and the process of account creation. Moreover, the chapter offers insights on how to configure Tableau Public for complimentary access to Tableau tools. Armed with this knowledge, readers will be well-prepared to delve into the connection between Salesforce and Tableau in the upcoming chapter.
Setting up a Salesforce org with CRM Analytics
The first thing you will need to set up to follow the examples in this book is an Analytics enabled Salesforce Org. This differs from a regular Salesforce Developer Org by having CRMA enabled out of the box, along with data you can explore to learn its functionality. We will be using this environment throughout the following chapters.
To create a new Salesforce Analytics Enabled Developer org, follow these steps:
- Navigate to developer.salesforce.com/promotions/orgs/analytics-de. This will take you to the sign-up form:
- Fill in the required fields in the form and click Sign me up >, as can be seen in the following figure. This will initiate the process of provisioning an org.
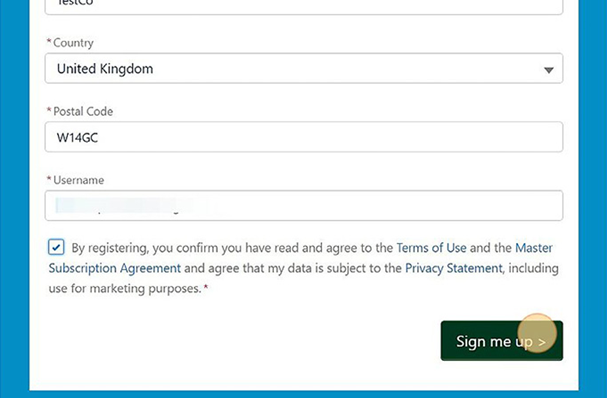
Figure 2.1: Filled in Sign-up form
3. You will now receive an email telling you the org has been created. This can sometimes take a few minutes. Click the button in the email to verify your account, as shown in the following figure:
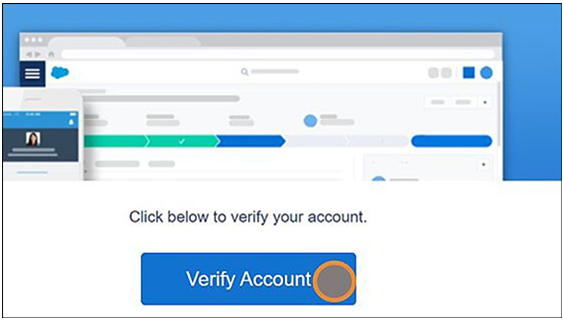
Figure 2.2: Verify account
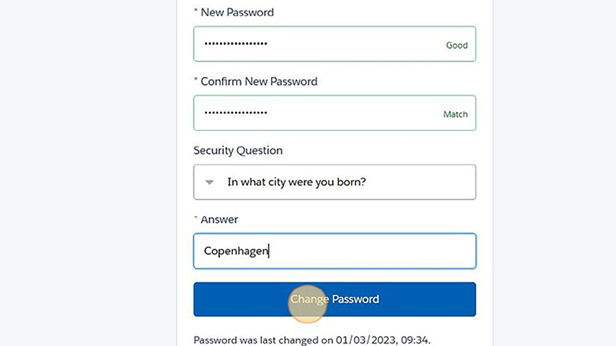
4. Enter the password you want to use for your new org and your security question and answer. Click Change Password to save and finish the provisioning process, as shown in Figure 2.3:
5. You have now created a ready-to-use Salesforce environment for this book.
Figure 2.4: Salesforce environment created
We will now proceed with installing Tableau Desktop, the main desktop application we will be exploring in this book.