Tableau Public is a free site for sharing data visualizations. By working in this space and downloading the free version of Tableau Desktop for use with Tableau Public, you get the opportunity to continue your learning journey beyond the initial 14-days trial.
To sign up for Tableau Public, follow the steps below:
- Navigate to https://public.tableau.com/app/discover
- Click Sign Up for Tableau Public, as per the following figure:
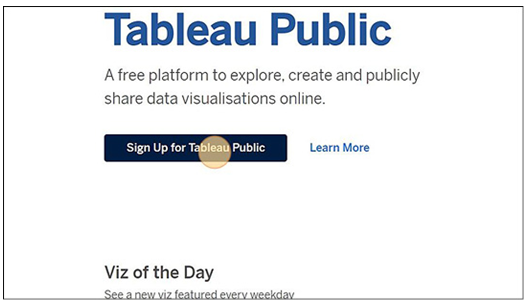
Figure 2.19: Sign up for Tableau Public
3. Fill in the form, answer the captcha, and click Create My Account. This will result in an email being sent for you to verify your email, as shown in the following figure:
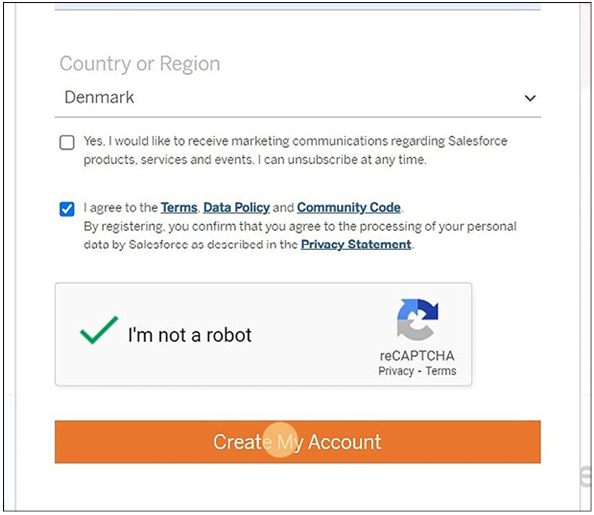
Figure 2.20: Create a Tableau Public account
4. On the ensuing popup, click Skip to profile, and you have successfully signed up for Tableau Public. Take a look at the following figure:
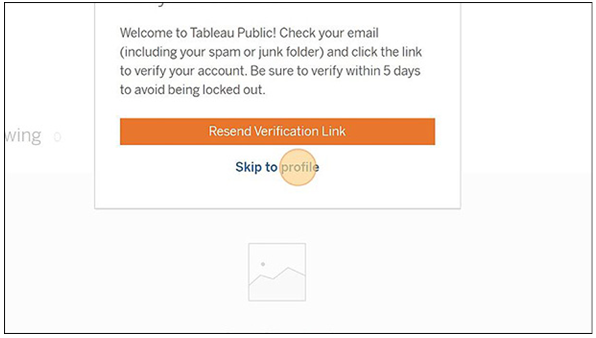
Figure 2.21: Skip to profile
5. Remember to verify your account by clicking the link in the email you have received.
You have now successfully installed or signed up for all the key components required for this book. Now, let us make sure it all works together by creating a “Hello World” example to check that everything works.
Now, it is time to put the tools together in an example that demonstrates that we are ready to move forward to the next chapter. We do that by connecting our Tableau Desktop instance to our CRMA Developer Org and creating a simple test chart based on data from that org.
To accomplish that task, follow these steps:
- Open Tableau Desktop.
- Expand the connections by clicking More under Connect | To a Server, as shown in the following figure:
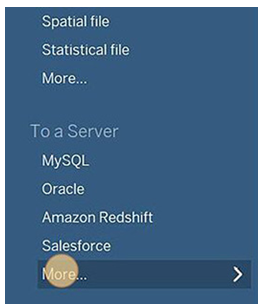
Figure 2.22: Connection to Salesforce
3. Click on Salesforce (Figure 2.23). This will start the connection to a Salesforce Data Source:
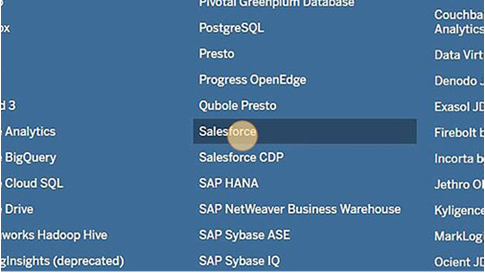
Figure 2.23: Pick the right connector
4. Login with your Salesforce credentials, as shown in the following figure:
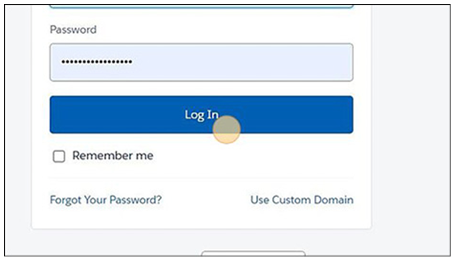
Figure 2.24: Enter Salesforce credentials
5. Click Allow to finish the authentication, as can be seen in the following figure:
Figure 2.25: Allow access for Tableau
6. Back in Tableau Desktop, drag the Accounts object to the canvas on the right, as shown in the following figure:
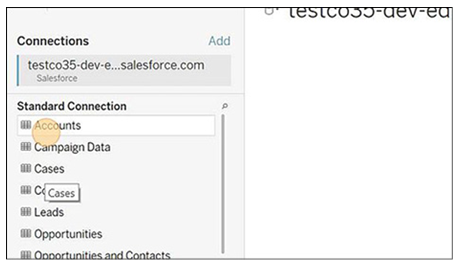
Figure 2.26: Drag Accounts object
7. Double-click Accounts, select the dropdown option for Record Type, and click Remove. Take a look at the following figure:
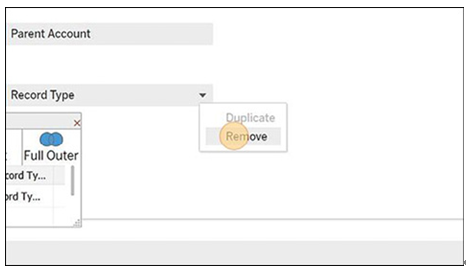
Figure 2.27: Remove Record Type